/ua-templates/version3/images/swbanner/swlogo-hz.png)

Creating Roxen Newsletter
Newsletter How To
NOTE: There are several things that need to be set-up for you to use the Roxen Newsletter functionality. If you would like to use Roxen Newsletter functionality please contact the Support Center and request that this be set-up.
1) To create a newsletter go to your site, "Enter Edit Mode" and create a page you would like to have as a newsletter
2) After creating the page click "Newsletter" on the top bar.
3) Click "Create"

4) Name your newsletter
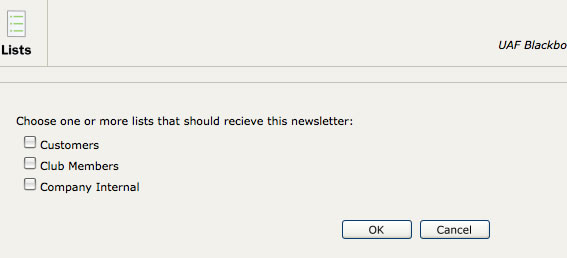
5) Click on the "Lists" icon and choose the appropriate list that should receive this newsletter.
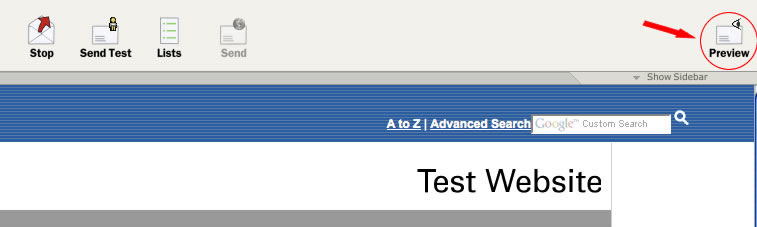
6) You can preview your newsletter by clicking "Preview" on the far right side
7) Add subscribe function to a newsletter:
a)Place the Newsletter WebReg component on a page by going back to "Main"

b) Connect the component to a previously created list

8)To send a test newsletter to a few e-mail addresses, click "Send Test", enter the e-mail addresses you would like to send the test e-mail to, and then click "Send".

Additional Notes on Newsletters
To send the same newsletter twice:
1) Stop the newsletter
2) Create the newsletter again
3) Send the newsletter again
To send a picture within the newsletter:
An absolute link has to be used - http://www.alaska.edu/mysite/myimage.jpg
Individuals that subscribe will put their email address in the Subscribe form and will be sent an html e-mail to confirm their subscription.
/ua-templates/version3/images/swLogo.gif)